Wednesday, January 29, 2020

GraphQL Nested Queries

The whole point of GraphQL is its flexibility, I can view all the authors in the database and then I can add an additional query that can display all the books by the one author, we call these nested queries. I recently spent an afternoon + evening with @manekenpix to take a look at nested queries in GraphQL for the Telescope project.

We currently have a schema like below
  # 'Feed' matches our Feed type used with redis
  type Feed {
    id: String
    author: String
    url: String
    posts: [Post]
  }  # 'Post' matches our Post type used with redis
  type Post {
    id: String
    author: String
    title: String
    html: String
    text: String
    published: String
    updated: String
    url: String
    site: String
    guid: String
  }

Notice feed can also return an array of Post,  to allow nested queries, we have to define them in resolvers after the Query:

module.exports.resolvers = {
  Query: {
    //Queries are here
  },
  Feed: {
    posts: async parent => {
      const maxPosts = await getPostsCount();
      const ids = await getPosts(0, maxPosts);
      const posts = await Promise.all(ids.map(postId => getPost(postId)));
      const filteredPosts = posts.filter(post => post.author === parent.author);
      return filteredPosts;
    },
  },
};

What the above code does is get all Posts in the database, then filter the Posts only returning Posts that have the same author as the returned value of the feed author. For example if I'm running the following query in GraphQL

{
  getFeedById(id: "123") {
    author
    id
    posts {
      title
    }
  }
}

and the author name is Marie, the parent parameter that is provided to the nested query (posts) will be the results of the getFeedById which in this case the author name is Marie.

Real life data using a classmate of mine:


Friday, January 24, 2020

OSD700 Release 0.5

As part of 0.5 I was working working mainly on two issues and got a chance to help someone start contributing to Telescope.

Async/Await
I've blogged a bit about using async/await to replace our Promise code in Telescope. I started the working during the winter break and was finally able to get that merged this week. The issue actually took a while as it spanned across ~15 files in Telescope and had me refactor functions and tests at the same time, which admittedly was pretty scary. I can say I know how to use async/await a bit better, but there's still a long road ahead!

Kubernetes(minikube)
My other issue I've been working on is a collaboration between me and another classmate @manekenpix to deploy Kubernetes(minikube) on a site for Telescope at http:://dev.telescope.cdot.systems/planet. We've had success being able to deploy services and even got the ingress to work on our own machines locally. However after 5 hours of sitting down and lots of expletives yelled at the computer, we had an issue when trying to deploy it on the machine CDOT has prepared to host Telescope. We forgot minikube runs using a vm on the computer, exposing the service and deployment only really exposes it to the computer the vm is running on. After a bit of researching and asking around on the slack channel we have decided to try a Bridged connection to expose the vm to outside traffic. We're crossing our fingers to have this for 0.6 (hopefully).

Helping a new contributor
Lastly, our professor Dave Humphrey has been actively recruiting students from his other classes to participate on Telescope (where was this teacher when I started learning web development). Which I think is an amazing idea as they gain experience in filing/fixing issues, receiving feedback and just collaborating with other programmers on an open source project. One student took on a great starter issue to standardize the error code on the project. I was kind of a mentor in helping the contributor get their code merged. This gave me flashbacks to OSD600 where our professor pretty much spent the whole semester teaching git and helping students with their git problems. Long story short, the student was able to get their PR merged and is happily taking on another issue. Git is hard and it is even more so when things land daily if not every few hours, the student admitted he used git before, but wasn't used to the pace at which Telescope moved.

The mentoring also taught me something, our professor has started to emphasize the importance of submitting a PR with some work completed instead of a full fledged PR. This way if their current work is starting to go sideways the community can direct the contributor to the correct path, preventing them from going further down the wrong path. For example, the contributor I was helping out kept trying to rebase, apply their changes then commit to their PR all in one go and this kept failing. Instead, I asked the contributor to:
  1. rebase their PR and drop any of the unrelated commits, push code to their PR. At this point we'd review and see what other changes we need to make, such as do we have to use any files from master to the working branch because a file on the working branch is too far gone?
  2. if the current status of the PR looked good, we'd apply their changes to fix the issue and review to see what other changes we need to make
This approach worked a lot better and the contributor got their PR merged today!

In hindsight, I think I've become a better programmer. 4/5 months ago I was attempting to enhance another person's simple note taking app on github.

Sunday, January 19, 2020

Async Await and Promises

As a continuation of my PR for Telescope, I thought I should talk a bit about async/await and the old way of using return new Promise(). Here are a few examples of do's and don'ts:

// Async functions return promises, no need to add await 
// DON"T DO
async function returnsPromise(){
  return await promiseFunction();
}

// DO
async function returnsPromiseFixed(){
  return promiseFunction();
}

//---------------------------------------------------------------------------

// Don't use await when function is not async 
// DON"T DO
function noAsync(){
  let promise = await promiseFunction();
}

// DO
async function noAsyncFixed(){
  let promise = await promiseFunction();
}
//---------------------------------------------------------------------------

// Writing errors
async function f() {
  await Promise.reject(New Error("Error"));
}

// SAME AS
async function f() {
  throw new Error("Error");
}
//---------------------------------------------------------------------------
// Use try catch to wrap only code that can throw // DON"T DO async function tryCatch() { try { const fetchResult = await fetch(); const data = await fetchResult.json(); const t = blah(); } catch (error) { logger.log(error); throw new Error(error); } } // DO async function tryCatchFixed() { try { const fetchResult = await fetch(); const data = await fetchResult.json(); } catch (error) { logger.log(error); throw new Error(error); } } const t = blah(); //--------------------------------------------------------------------------- // Use async/await. Don't use Promises // DON"T DO async function usePromise() { new Promise(function(res, rej) { if (isValidString) { res(analysis); } else { res(textInfo); } if (isValidStrinng === undefined) { rej(textInfo); } }) } // DO async function usePromiseFixed() { const asyResult = await asyFunc() } // -------------------------------------------------------------------------- // Don't use async when it is not needed... Don't be overzealous with async/await // For example the sentiment module we're using is not an async function // DON"T DO module.exports.run = async function(text) { const sentiment = new Sentiment(); return Promise.resolve(sentiment.analyze(text)); }; // DO module.exports.run = function(text) { const sentiment = new Sentiment(); return sentiment.analyze(text); }; // -------------------------------------------------------------------------- // Avoid making things too sequential // DON"T DO async function logInOrder(urls) { for (const url of urls) { const response = await fetch(url); console.log(await response.text()); } } // DO async function logInOrder(urls) { // fetch all the URLs in parallel const textPromises = urls.map(async url => { const response = await fetch(url); return response.text(); }); // log them in sequence for (const textPromise of textPromises) { console.log(await textPromise); } } // --------------------------------------------------------------------------
// Examples
// refactor following function:

function loadJson(url) {
  return fetch(url)
    .then(response => {
      if (response.status == 200) {
        return response.json();
      } else {
        throw new Error(response.status);
      }
    })
}

// Solution:
function loadJson(url) {
  let fetchResult = await fetch(url);
  if (fetchResult.status == 200){
    let json = await fetchResult.json();
    return json;
  }

  throw new Error(fetchResult.status);
}

// refactor to use try/catch
function demoGithubUser() {
  let name = prompt("Enter a name?", "iliakan");

  return loadJson(`https://api.github.com/users/${name}`)
    .then(user => {
      alert(`Full name: ${user.name}.`);
      return user;
    })
    .catch(err => {
      if (err instanceof HttpError && err.response.status == 404) {
        alert("No such user, please reenter.");
        return demoGithubUser();
      } else {
        throw err;
      }
    });
}

demoGithubUser();

// Solution:
async function demoGithubUser() {
  let user;
  while(true){
    let name = prompt("Enter a name?", "iliakan");
    try {
      user = await loadJson(`https://api.github.com/users/${name}`)
      break;
    } catch (err) {
      if (err) {
        alert("No such user, please reenter.");
        return demoGithubUser();
      } else {
        throw err;
      }
    }
  }
}

// Call async from non-async
async function wait() {
  await new Promise(resolve => setTimeout(resolve, 1000));

  return 10;
}

function f() {
  // ...what to write here?
  // we need to call async wait() and wait to get 10
  // remember, we can't use "await"
}

// Solution:
function f() {
  wait().then(result => alert(result));
}

Saturday, January 11, 2020

Wednesday, January 8, 2020

Kubernetes Pt3


*Blessed*

Image result for angel singing meme

Thank you @manekenpix, I still have no idea how to fix all the problems we came across, but let us just enjoy this for now.

Monday, January 6, 2020

Kubernetes Pt2

In the previous post we used kubectl command lines to deploy. However we can create .yaml configuration files and have kubectl create them that way also

the .yaml file will have the following

apiVersion: (name)
kind: Deployment
metadata:
  name: (appName)
  labels:
    app: (imageTag)
spec:
  replicas: (replicaNumber)
  selector:
    matchLabels:
      app: (imageTag)
  template:
    metadata:
      labels:
        app: (imageTag)
    spec:
      containers:
      - name: (imageTag)
        image: (dockerImage)
        ports:
        - containerPort: (portNumber)

Then enter the following command:
kubectl create -f (.yaml file)

I pulled an example from the edx Kubernetes course using the nginx image to deploy a webserver

apiVersion: apps/v1
kind: Deployment
metadata:
  name: webserver
  labels:
    app: nginx
spec:
  replicas: 3
  selector:
    matchLabels:
      app: nginx
  template:
    metadata:
      labels:
        app: nginx
    spec:
      containers:
      - name: nginx
        image: nginx:alpine
        ports:
        - containerPort: 80

This will deploy an app named webserver replicated across three pods.

We can also define a appName-svc-.yaml file to expose our service with the following content:

apiVersion: (get this value from running kubectl api-version)
kind: Service
metadata:
  name: web-service
  labels:
    run: web-service
spec:
  type: (serviceType)
  externalName: (externalLink) *Use this field if serviceType is set to ExternalName
  ports:
  -  port: (portNumber)
     protocol: TCP
  selector:
    app: (imageTag)

Then enter the following command:
kubectl create -f (appName)-svc.yaml

serviceType can be any of the below:
  1. LoadBalancer - if the cloud provider Kubernetes is running on provides load balancing.
  2. ClusterIP - can only reach the service only from within the cluster
  3. NodePort - creates a ClusterIP and NodePort service will route to it. Allows access from outside the cluster by using NodeIP:NodePort
  4. ExternalName - maps the service to the contents of the externalName field
Also pulled from the edx Kubernetes course:

apiVersion: v1
kind: Service
metadata:
  name: web-service
  labels:
    run: web-service
spec:
  type: NodePort
  ports:
  -  port: 80
     protocol: TCP
  selector:
    app: nginx

Kubernetes

Containers became all the rage nowadays, I have 0 experience with either Docker or Kubernetes. This post serves to kind of explain some concepts Kubernetes for myself.

Pods - can be made up of one or more containers. Pods can also be replicated horizontally to allow scaling of an app.

Deployments are used to manage pods, to deploy a pod we use the following line
kubectl create deployment (appName) --image=(imageName)

kubectl get deployments - will display all current deployments

kubectl get pods - will display all pods 

kubectl get events - will display all the things that have happened, such as new pods

Although we have created a deployment for our pod, it is only accessible within the Kubernetes cluster. A Service is enables access to the deployed App, to create a Service we have to use the following command

kubectl expose deployment (appName) --name=(serviceName) --type=LoadBalancer --port=(portNumber)

*if the --name=(serviceName) flag is not provided, the service will default to the appName
*--type= can be any of the below:
LoadBalancer - if the cloud provider Kubernetes is running on provides load balancing.
ClusterIP - can only reach the service only from within the cluster
NodePort - creates a ClusterIP and NodePort service will route to it. Allows access from outside the cluster by using NodeIP:NodePort
ExternalName - maps the service to the contents of the externalName field

We can verify the Service has been created by using the following command:
kubectl get services , this will display all the Pods exposed 

minikube service (serviceName) , will launch the service within the pod.


Technically the steps we need to follow to deploy an app on Kubernetes
1. Create a deployment to manage (kubectl create deployment (appName) --image=(imageName))
2. Expose the deployment kubectl (kubectl expose deployment (appName) --name=(serviceName) --type=LoadBalancer --port=(portNumber))
3. Run the service (kubectl service (serviceName))

To replicate the pods we use the following command
kubectl scale deploy (appName) --replicates=(replicateNumber)

On a side note, this also lets us manage some deployments on the fly. Say our current image is not compatible with other images, we can change the version by using the following command.
kubectl set image deployment (appName)=(imageName)

Kubernetes tracks histories of all changes made to the deployment, such as when changing the image for a deployment. They can be viewed with the following command
kubectl rollout history deploy (appName)

When changes are made to the image, Kubernetes will automatically scale down replica sets of the deployment with the old image and automatically spin up the same number of replicas for deployment with the newer one. We can verify this by using
kubectl get rs -l app=(appName)

To rollback changes made to a deployment we use the following command. The revisionNumber can be any of the ones listed when running the command kubectl rollout history deploy (appName)
kubectl rollout undo deployment (appName) --to-revision=(revisionNumber)

When rolling back changes, a new revision will be made and it will also remove the revision number of the one we rolled back to. For example I initially deployed with an image of version 1.15 and changed the image to version 1.16. There should be a total of 2 revisions: 
  • 1 (my initial image of version 1.15)
  • 2 (my current image of version 1.16)
If I roll back to revision 1 with the above command, a new revision will be added to the table 3, and revision 1 will be removed. My history will now look like the following:
  • 2 (image of version 1.16)
  • 3 (image of version 1.15, I rolled back to)
Kubernetes tracks up to 10 revisions for your rollback pleasure.

To delete the deployment use the following command
kubectl delete deployments (appName)

Friday, December 20, 2019

So I Added New Linting Rules

An issue was filed for Telescope to address consistency and proper use of async/await + promises and fix them. I added new linting rules. Ran an npm test:


Oh my god.

Wednesday, December 18, 2019

Amazon Algorithm Solution

I was going over a blog by a classmate of mine who's been contributing a lot to our internal project. I stumbled upon a post of his regarding Amazon's online technical interview question and decided to take a crack at it in Javascript.

It is pretty simple: Given 2 lists of numbers and a maximum, find the maximum sum of a number from list2 that is smaller or equal to the given maximum as well as the number of occurrences.

This is the first attempt of what I had, with what I understood as the requirements
// Given 2 lists of numbers and a maximum, find the maximum of sum of a number from 
// list1 + a number from list2 that is smaller or equal to the given maximum, as 
// well as the number of occurrences.

function find(list1, list2, max){
    let resultsArr = [];
    // we will filter list2 for nums that are small or equal to given max
    list2.filter((x) => {
        return x <= max
    })
    // we will then use the filtered list and get a sum of each
    .map((filteredNum) => {
        list1.forEach((num) => {
            resultsArr.push(num + filteredNum);
        })
    })

    console.log(resultsArr.length)
    console.log(Math.max(...resultsArr))
}

let list1 = [5,10,15]
let list2 = [1,2,3]
find(list1, list2, 2);

It works and does as expected, but upon re-reading the requirements again. I decided to do another one. This is the second attempt of what I had, with revised understanding of requirements
// Given 2 lists of numbers and a maximum, find the maximum of sum of a number from 
// list1 + a number from list2 that is smaller or equal to the given maximum, as 
// well as the number of occurrences.

function find(list1, list2, max){
    const results = []
    list1.map((num1) => {
        list2.forEach((num2) => {
            const num = num1 + num2;
            if (num <= max){
                results.push(num);
            }
        })
    })

    const maxResult = Math.max(...results);
    const finalResult = results.filter((num) => {
        return num == maxResult;
    })

    console.log('The list of sums: ' + results);
    console.log('The largest sum less than or equal to ' + max + ' is ' + maxResult);
    console.log('The # of occurrences for the largest sum is ' + finalResult.length);
}

let list1 = [13,13,15]
let list2 = [1,2,3]
find(list1, list2, 15);

Tested it and it works!

The list of sums: 14,15,14,15
The largest sum less than or equal to 15 is 15
The # of occurrences for the largest sum is 2

Further tweaks I could do, would be to have a variable to hold the max value for the current iteration and have a counter that will track, instead of pushing to an array and then doing all the work at the end

Saturday, December 14, 2019

SPO600 Project Post 5

After reviewing other's people work on their projects. I've realized I forgot to test on the other systems Bbetty and Xerxes. I first attempted to install Redis onto Xerxes, our x86_64 system... No go, apparently everyone loves testing on the machine so much there's no more storage space left to install my project.

So that left Bbetty, wow. This machine is much faster than Aarchie, its sibling Aarch64. The same benchmarks I was running on Aarchie were completed in half the time:


Average run time was about: 25.67 seconds

As my optimizations didn't work on Aarchie, I was pretty sure they weren't going to work on Bbetty either, but for the sake of curiosity I decided to test them and here are the results:


Average run time was about: 25.64 seconds, 0.02 faster, but again like Aarchie, this was a small sample out of many I did and they weren't always reliably faster.

I doubled the amount of SET operations to 2 million to see if there were any efficiencies gained, because perhaps there might be some if there was more requests processed? I got average run times of about 51.435 seconds. A big giveaway whether optimizations gained from my code changes would be to check the throughput of the requests per second completed. They remained relatively the same if not a bit lower sometimes than the non modified code. So I'm pretty sure I can conclude my changes have failed to produce any optimizations. 

For anyone extremely curious about the call graph for the benchmark of the 1 million SET operations (I apologize for the poor picture quality):

Wednesday, December 11, 2019

SPO600 Course Wrap Up

We're at the end of the course! This felt like a really long course, but very interesting and fun. Throughout all of my years at Seneca I never really got to interact close to the hardware level, and this course finally allowed me to. I can finally say I've programmed in assembly language!

Overall, I found this course extremely difficult, I'd listen to the lecture in class, look at the lab briefly and kind of just close the window. The labs themselves were pretty challenging and required us to look up a lot of stuff as well as reading other people's blogs if we were stuck to get an idea of how to proceed. Which isn't that much different from the real world when we do get stuck. I recall setting aside a whole weekend just to do the weekly labs.

As a student who only learned the basics of C for a semester as an introductory course, trying to understand the C code being used or talked about in class was also challenging. That coupled with the fact that our project selections were recommended to be in the C language also made it extremely hard, as I'm assuming most of the libraries are written by people who are very fluent in C. Trying to read the code is kind of like deciphering a language we barely know.

All this isn't to say I didn't enjoy the course, it was quite the opposite. I don't think I've found another course aside from this(SPO600) or OSD600 where I decided to spend so much time on it. Our professor, Chris Tyler was amazing, with lots of professional experience and also keeps himself up to date with the industry. During the project phase of the course he'd show us possible optimizations for libraries every week as he knew quite a bit of us were frustrated on trying to find one. He also tried help remove any roadblocks we encountered by tackling them in class.

I'm a little disappointed and sad I wasn't able to find an optimization for my project Redis, as I thought it would've been pretty cool to put it on the resume for potential employers and also the fact that we're using Redis as part of an internal project for the school. It was fun though doing instrumentation and profiling on Redis and analyzing the results to see if my changes improved the run time of SET operations.

Lastly, I'd like to thank Professor Tyler for teaching this course and also spending time on analyzing the results of the profiling and instrumentation of my project!

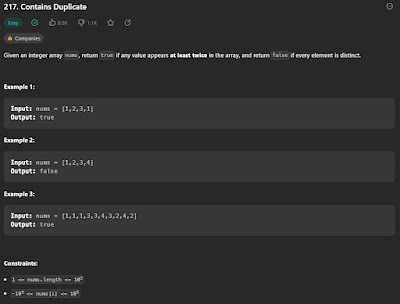
Contains Duplicate (Leetcode)

I wrote a post  roughly 2/3 years ago regarding data structures and algorithms. I thought I'd follow up with some questions I'd come...